GetUSB.info Logo

Chromebook Gets a USB Guard

Anyone in tech has seen the reports and news about USB sticks with a virus ruining a company network or infecting computers. Google built a small and effective feature: Chromebook Gets a USB Guard.

Chromebook Gets a USB Guard

The USBGuard is a feature that blocks interaction between the mass storage device and the Chrome operating system. The OS will give power to the device, but not let data transmit.

The USBGuard blocks this activity when the Chromebook is in locked mode. When the Chromebook is not in lock mode, the USB will interact as expected as a read/write device.

Continue Reading

USB Two Factor Authentication Dongle

Yubico YubiKey 4 appears to be an excellent device for a two-factor authentication solution. Two factor authentication means you need two things before gaining access. In this case, one piece of information is your password and the other piece is your finger print.

If you are using a password manager right now, (ie. Last Pass, Dashlane, etc) I would recommend getting this. The benefit of this device with a password manager is you can enable two factor authentication to add a new device capable of signing into your account.

YubiKey

This means if someone knows your password, it doesn’t really matter because they would also need your finger print. Understand that nearly all password managers conform to some sort of security protocol like FIDO U2F, smart card (PIV), OpenPGP, etc which in turn works with Yubikey.

Continue Reading

How To Partition a USB Flash Drive in Windows

Using Windows 10, you can partition a USB flash drive into multiple partitions. The process is not difficult; you simply follow some easy steps. This tutorial will partition the drive so that your device is assigned multiple drive letters when connected to the computer.

This partition process is not done at the USB controller level, or said another way, done at the hardware level. This USB partition process, for lack of better terms, is done at the software level. What does this mean for you? It means the partitions can be wiped off the drive and the full capacity of the USB flash drive can be restored.

When a USB stick is partitioned at the controller level, or at the hardware level, there is no way to reverse the partition. The multi-partition drive is permanent. At the end of this tutorial is the solution for a hardware-based partition solution.

So let’s get started.

How to partition a USB flash drive in Windows 10:

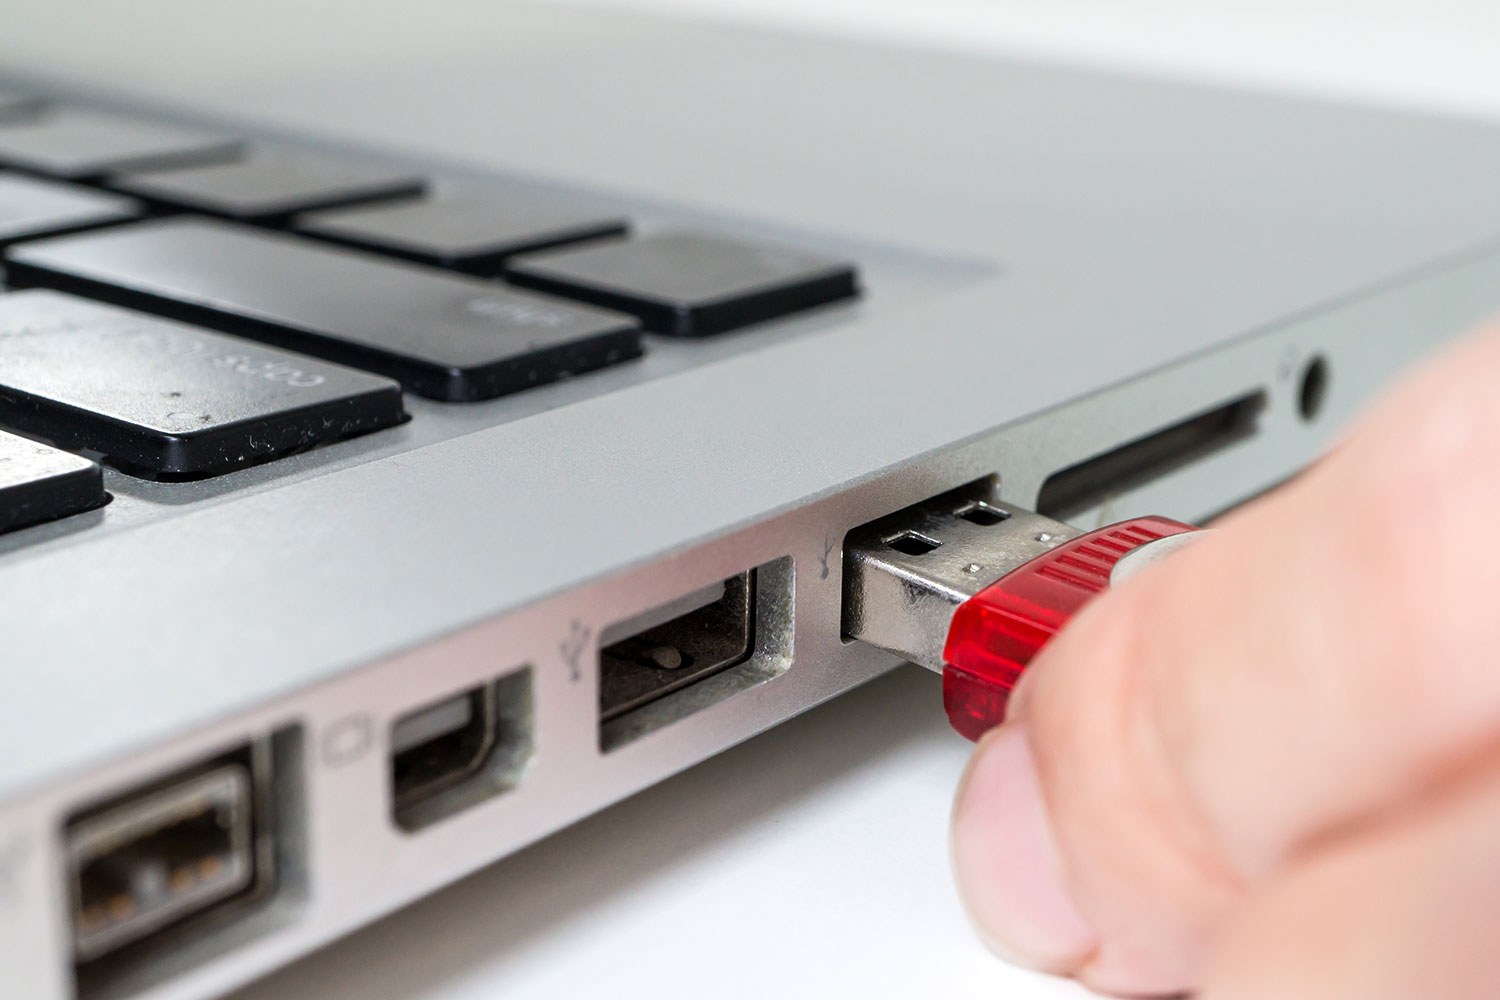
Connect the USB flash drive to your Windows 10 machine. Be sure there is nothing valuable on the USB as this process will remove all content from the drive.

Right Click the Windows icon and select Disk Management.

How To Partition a USB Flash Drive in Windows - Disk Management Access

The Disk Management window will appear with all the connected devices. Select your USB flash drive by clicking one time. By selecting your flash drive, it will allow Windows to apply the partition to that device.

Partition a USB Drive in Windows - Select USB Device

You will see your flash drive as Disk X. The device is represented by diagonal gray lines. Right Click your device in the diagonal gray line area on your screen and select Delete Volume.

Delete Volume to Partition USB in Windows

Windows will display an error message stating all the contents of the device will be removed. Confirm Yes.

USB Flash Drive Partition Setup - Windows Confirmation

You will now have an unallocated partition for the flash drive. This means a file system is not assigned to the drive. Having no file system on your USB means you cannot save data to the drive. We need to create a file system for this partition, i.e., FAT, FAT32, NTFS, or exFAT.

At the same time, we assign a file system to this partition, we will also slice up the USB flash drive to create multiple partitions.

Right Click the unallocated space on your screen, represented by the diagonal gray lines. Select New Simple Volume from the options presented.

Create New Simple Volume - Partition USB Drive in Windows

A Microsoft wizard utility will start. Click Next from the first introductory screen. Windows will display the total amount of memory available to the device. This is where you will enter the size of your first partition. In this example, I am using a 2GB flash drive (1,896MBs) and will make a first partition of 500MBs.

Set Partition Size for USB Flash Drive in Windows

The rest of the wizard utility is auto-populated and straightforward. For example, the wizard will ask if you want a specific drive letter assigned to the partition once the process is done.

The wizard utility will ask you what file system you want for this new partition. If you are not sure, just leave the auto-populated selection from Windows.

TIP: If you want the dual partition USB drive to also work in Mac computers, be sure to format the drive as FAT, FAT32, or exFAT. Do not use NTFS, as Mac computers will only read the content but cannot write to the device. In fact, read this article on why to never format USBs as NTFS.

Be sure to set a volume name to the device so the partition (new drive letter) will be easy to recognize.

Name Partition - USB Flash Drive Setup Windows

Click Finish for Windows to make this first partition. Looking in Disk Management once the wizard has closed, you will now see the device with one partition and a balance of the drive as unallocated.

Partition USB Flash Drive - Disk Management Final View

Rinse and Repeat. Do the same steps as above for this smaller unallocated memory space.

After the second pass using the partition wizard for Windows, you will have a dual partition USB drive with two drive letters. Each USB flash drive letter will work and appear like a normal, single flash drive. You can data load each partition as normal. You can even flash one partition to make it bootable if you are into making bootable USB sticks.

Dual Partition USB Drive Setup in Windows

Although the above tutorial makes things easy to partition a USB flash drive into multiple drive letters, this method is not permanent. Using the same steps, you may clear out all the partitions and its content. For some users or companies, having an unsecured dual partition drive is not ideal for their business practice or application. There is an alternative. There is a method to partition a USB at the hardware level.

In order to partition a USB drive at the hardware level, or controller level, you will need some specific controller chips and the vendor commands to set up the partitions. These tools are not readily available as there are hundreds of chip makers and thousands of USB suppliers. However, Nexcopy has a solution for business-to-business applications for creating dual partitions at the controller level.

In addition, Nexcopy has the ability to make these partitions write-protected, or read-only. If this hardware solution is what you need, please contact them.

Continue Reading

What’s the Difference Between USB and UDISK?

With all the gadgets we post about here at GetUSB.info sometimes a word or definition can get twisted on it’s meaning. One of those terms is UDISK. First, please don’t complicate the term into something more than it is. There are two answers to this question.

There is the “slang” term for UDISK and there is the “technical” term for UDISK.

The “slang” term for UDISK

The Asia / Pacific Rim region use the term UDISK to describe a flash drive. This is the most common use of the term “UDISK” for no-technical people. In the United States and Europe people do not use the term UDISK to describe a flash drive, rather the common term of “USB flash drive” or “thumb drive” or “USB key.”

USB Drive

The “technical” term for UDISK

The technical term for UDISK is a bridge chip which is used inside an enclosure to turn a hard drive into an external storage device that connects via USB cable.

For example, in the picture below is a hard drive enclosure which is designed to hold a magnetic hard drive and turn the hard drive into an external storage device. A magnetic hard drive typically has an IDE or SATA connection interface and a UDISK chip is used to bridge the IDE (or) SATA interface to that of USB. This bridge chip (UDISK) changes the hard from from IDE protocol (or SATA protocol) to a USB protocol.

UDISK, bridge chip

Examine the picture a bit closer and you can clearly see the SATA interface on the PCB. On that same PCB is the UDISK bridge chip which does the protocol translation.

The second image shows the back side of the external hard drive case with the USB cable connected to the enclosure. Using the UDISK bridge chip allows for an IDE or SATA hard drive to be connected to a host computer system via USB cable.

UDISK, bridge to USB

Cypress Semiconductor (now Infineon) makes such a bridge chip, called the FX3.

Conclusion:

UDISK is most commonly used to describe a USB flash drive.

Technically the term UDISK describes a bridge chip used in hard drive enclosures.

Continue Reading

Extra Facebook Security With USB Keys

Account security is one of the most vital pieces of the busy and interconnected world right now and nobody wants strangers accessing their personal information online. You might use a password manager as well as two-factor authentication like we mentioned in a previous post, but now there’s another way to stay protected.

Data Cable


In response to similar approaches from Google and Dropbox, Facebook has added support for safe login security keys. When you log into your account, this device will prove your identity rather than a code which sends to your phone. In addition to the superior security, they’re also potentially faster. With just a tap on the device you can have access to your Facebook account and feel safer in knowing only you can unlock it. It’s a welcome move from the company in an age where cyberattacks and identity theft are on the rise and as a universal rule on the internet, it’s never a bad time to strengthen your defences.

Continue Reading

Trained Dogs to Sniff Out SD Cards and USB Sticks

USB stick, dog

Police dogs have yet another smell they must detect. Tactical Detection K9 company now trains dogs to sniff out SD cards and USB sticks. The training is in response to better assisting law enforcement in child pornography investigations.

The percentage of a dog’s brain which is devoted to analyzing smells is 40 times greater than humans. For example, humans can detect about 5 million scents and a German Shepherd can detect around 225 million smells.

In a recent investigation a dog was used in the FBI raid of the home of the former Subway spokesman Jared Fogle in Hancock County, Indiana.

What could take investigators hours to find an SD card or USB stick in a house would take a trained dog considerably less time, probably no more than 30 minutes.

According to Tactical Detection K9 it took scientists over four years to isolate the odor associated with memory devices. Now that a specific odor has been identified it takes 8-9 months for a dog to be trained in picking up that scent.

A dog which can sniff out SD and USB sticks can cost upwards of $9,000.

Source: IB Times and Dummies.com .

Continue Reading

Cannot Format a USB GPT Protective Partition

Sometimes you will connect a USB to the PC and get an error message saying the drive has a GPT Protective Partition and you cannot format the drive. Here is the fix to resolve the issue:

First, what is a GPT USB stick? The GUID Partition Table (GPT) is the successor to the Master Boot Record. The MBR was created by IBM back in the early 90s. The problem with MBR is the limitation to partition table sizes which is 2 Terabytes.

Since there are no 2T USB flash drives (at the time of this post), there is no need to use GPT as your partition table.

Removing the GPT Protected Partition can be accomplished through the Windows Diskpart program.

  • Determine the Disk Number for the USB GPT-protected drive. To do this, perform the following:
  1. Right-click on (My) Computer.
  2. Choose Manage.
  3. Select Disk Management (listed under Storage).
  4. Look for the drive that is identified as GPT and note the Disk number (such as Disk 1).
Format USB GPT Protected Partition
  • Now, open a Command Window. From the command prompt, type diskpart and press Enter.
  • The diskpart prompt will open.
  • From the diskpart prompt, type list disk and press Enter. A list of disks will appear in a text format. You will return to the diskpart prompt.
  • From the diskpart prompt, type select disk disknumber (in this example from the screen shot above, you would type select disk 1)and press Enter. A message appears saying that the disk is selected. You will return to the diskpart prompt.
  • From the diskpart prompt, type clean and press Enter. At this point the drive’s partition and signature a removed. You will return to the diskpart prompt.
  • From the diskpart prompt, type exit and press Enter. Type exit once more to close the Command Window.
Continue Reading

How To Make a USB Read Only

There are two ways on “How to make a USB read only.” One method will make the USB read-only in anything it is connected to, so you could say this is a universal way of making a flash drive write protected.

The other way is a PC-specific solution where some registry edits are required to any computer the USB flash drive is connected to.

When we say 100% permanent, this means the USB stick is read only (write protected) on all devices, whether it be computers like a Mac, Windows PC, Linux box, or non-processor based products like a car stereo. This permanent solution also means the status of the drive cannot be changed. The other method flags a USB device to be read only in relationship to the PC it is connected to so that whenever that USB stick is connected to that computer, it makes the USB read only and blocks all write commands to the device.

Most times an IT manager or content owner wants the USB stick to be read only so the files cannot be deleted or formatted off the drive. Another reason for making a USB read only is for the original files to remain the same and block the ability for files to be changed or manipulated. Finally, it’s smart to have USBs read only so that viruses don’t jump onto the drive and possibly spread to other computers.

Let us start with the less permanent way because it’s easier to do and doesn’t require any specific hardware.

You will need a Windows7 machine or higher. The Windows7 machine will have DiskPart utility which allows us to perform all sorts of cool things to flash drives, like setting write protection.

  • Connect the USB to your Windows computer.
  • To begin, go to your Windows Start and in the Search Field type cmd
How To Make a USB Read Only command prompt example

This will run your Command Prompt.

  • Next, you will want to get to the C root of the Command Prompt and if you are signed in as a user you can simply type cd\ – this will get you back to the root of the C drive.
  • Type DISKPART
  • Type LIST DISK

Now you will need to find the USB stick connected to your PC. Most likely it’s DISK 1

Continue Reading

Stand alone Windows Password Reset Tool

One of the most classic and – yet still perversely prevalent – issues IT staff face is resetting Windows passwords for users who have forgotten them (again). While remote administration has reduced the need to physically reactivate and reset passwords in most scenarios, a copy of L0phtcrack still remains in every experienced admins ‘toolbox’. Of course, having to reboot the system and use a copy of Bart PE or other portable OS’ to run L0phtcrack has a PITA factor all its own. USB key reset tool   Well, it seems that entrepreneur Jonty Lovell has done something about it as the all new – and fully funded – Password Reset Key has been designed to take the hassle out of this common issue. In fact, as long as you have physical access to the system even home owners can now reset their forgotten password within mere moments. The secret to the Password Reset Key is the fact that it combines a key shaped 1GB flash drive – available in black, stainless steel, or ‘gold’ – with a simple OS that auto-loads his custom software upon startup. Just as with L0phtcrack, with a simple click or three, you can scan, reset and even test how secure a given systems login passwords are. Because of its ‘key’ form factor, it will be hard to lose as you can simply stick on your keychain and always have it close at hand. However, be warned that this $15 – $50 device (depending on which option to choose) may get you in trouble with your IT staff as resetting the ‘administrator’ password will greatly ‘annoy’ them if they find out. Continue Reading

Protecting IP on USB

Protecting IP on USB, USB Copy Protection Solutions by Nexcopy

The above InfoGraph was provided by Nexcopy Company and highlights the current options and services available for Protecting IP on USB, often referred to as USB Copy Protection. The concept behind this USB copy protection solution is the ability to share digital files on a flash drive with others while restricting their ability to duplicate or distribute that information without authorization.

With the above solution, a user can protect multiple file types, including popular multimedia formats such as PDF, MP3, QuickTime, MP4, M4V, HTML, Flash, and other supported files. This post is not intended as advertising but rather as an informational overview of products and services for protecting IP on USB flash drives currently available in the market today.

CopySecure USB Drive – Key Features Explained

1. Compatible with Mac and Windows

The protected content on a CopySecure drive can be viewed on both Mac and Windows computers using included MacViewer and PCViewer apps—ensuring full cross-platform support.

2. No Administrator Rights Required for Playback

Recipients do not need admin privileges to run the viewer application. The encrypted files can be accessed directly from the drive without installing software.

3. No Installation Required on the Host Computer

Viewers launch and run directly from the flash drive itself—there’s no software setup required on the user’s system.

4. Content Runs 100% from the Flash Drive

All playback—including decryption—happens locally. There’s no internet connectivity, cloud authentication, or external servers involved.

5. Immune to Deletion or Modification

CopySecure drives are hardware write-protected—data cannot be deleted, overwritten, formatted, or modified at the controller level on the device.

6. Hardware + Software Encryption Layered Protection

This solution is not just encryption, but a combined hardware/software DRM system:

  • Files are encrypted (e.g., DES encryption).
  • A custom viewer governs access (disabling print, copy, paste, screen capture, save).
  • The license is embedded to the physical drive—no recurring subscription needed.

Additional Advanced Capabilities

Dual-Partition Drive Format

You can partition the drive into:

  • A read-only protected partition containing encrypted DRM content.
  • An optional standard (read?write) partition for supplemental files or updates—not protected. Ideal for combining marketing collateral or user manuals alongside protected IP content.

Supported File Types

CopySecure drives support a wide range of content formats:

  • Documents: PDF, TXT, XML, CSS
  • Web pages: HTM / HTML / HTML5
  • Images and animations: JPG, GIF, PNG, SWF
  • Audio: MP3, WAV
  • Video: MP4 (H.264 up to 1080p), WMV, MOV, M4V

Time?Expiration / DRM Features

You can optionally configure content to expire at a set date or time, useful for timed access to training materials, courses, or contracts.

How It Works – Process Overview

For the Content Owner:

  1. Order licensed CopySecure USB media from Nexcopy with DRM license embedded.
  2. On a Windows PC, install the CopySecure Wizard software. Use it to encrypt and load content onto the drive; the tool also installs PCViewer and MacViewer on the drive.
  3. Lock the drive—making the protected partition permanently read-only at the hardware level.

For the End-User:

  1. Insert the flash drive and open the appropriate viewer (MacViewer or PCViewer).
  2. Run protected files directly from the drive — no installation or extra setup.
  3. The viewer prevents actions like save-as, print, screen capture, or copying text. Files appear normal but cannot be extracted or replicated outside the viewer environment.

Caveats & Practical Considerations

  • Screen capture protection is imperfect: On Windows, capturing screens can occasionally succeed before the viewer detects and deletes the screenshot; on Mac, users may deny viewer permissions, making capture possible.
  • Viewer updates may be required: If future operating system changes break viewer compatibility, you can update the viewer on the drive using the “Update Copy Secure” option within the Nexcopy software—but content remains locked and cannot be changed or added afterward.
Continue Reading

BlurPort Is Gate Keeper For Your USB Things

BlurPort is putting a cool twist to securing your USB devices.  From flash drives to hard drives BlurPort has you covered. The product can be found (and funded) on Kickstarter right now.  The concept is the BlurPort device is an 8GB stick…but it’s more.  The BlurPort uses a multi-factor authentication method to unlock your digital content.  Meaning you need the knowledge of the password and you need a physical device to act as the token.  What is the physical device you ask?  Simple:  your smartphone. The BlurPort app on your phone will offer many different ways to authenticate yourself, from facial recognition and eye scanning to NFC tokens, even pattern trace passwords. So who wants another 8GB flash drive…well the BlurPort can also grant access to your USB hard drive and other storage devices.  By removing the tail end of the BlurPort you now have a female USB socket for connecting another USB peripheral.  This is where we believe the product is very unique.  The BlurPort (now you can understand the name) is the gate-keeper for all your USB devices.  It’s the digital road block to access and only your dual authentication will grant access. Work flow after the jump: Continue Reading

Copyright

Copyright © 2006 +

USB Powered Gadgets and more...

All Rights Reserved

Advertise with us

GetUSB Advertising

This is a high value website providing great exposure to your product and brand. Visit our advertising page to learn specifics.

For more information
Visit our advertising page.

Nexcopy Ad

Nexcopy Provides

USB copy protection with digital rights management for data loaded on USB flash drives.

Contact us learn more

Resources and References Page

Resources and References Page