If you found this post, chances are you are trying to delete the System Volume Information folder from a USB flash drive.
UPDATE:
Thanks to a reader who shared additional details, we now have a solution that works universally across Windows PCs. This approach prevents the recurring message, “There’s a problem with this drive. Scan the drive now to fix it.” To apply the universal fix, scroll to the bottom of this article and look for Updated Solution.
There are several common reasons people want to remove this folder:
- A Smart TV or car stereo displays the folder and uses it as the default playback location.
- A binary or checksum verification utility flags the folder as inconsistent.
- Windows repeatedly shows the “Disk needs to be scanned and repaired” message when a drive is removed without ejecting.
- Antivirus software reports the folder as a potential risk.
- A USB duplication or production workflow is disrupted by the folder.
You can skip ahead to the instructions if you prefer, but understanding what this folder does may help you decide whether removing it makes sense.
Any storage device connected to Windows will contain a System Volume Information folder. It is hidden by default, which is why you may not see it unless hidden files are enabled.
This folder typically contains two files used for restore points and indexing. Windows uses this information to speed up searching and to associate drives with internal search databases.
The files are usually IndexerVolumeGuid and WPSettings.dat. The GUID assigns a unique identifier to the drive so Windows knows which index database to use when the device is reconnected.
The WPSettings.dat file is related to Windows Phone storage settings. On a hard drive this may be useful, but on a USB flash drive it serves little purpose.
If this were a system hard drive, deleting the folder would not be recommended. For removable storage such as USB flash drives, removing it generally carries very little risk.
So how do you remove this folder?
And how do you stop it from coming back?
The process has two parts. First, remove the folder from the drive. Second, configure Windows so it does not recreate the folder in the future.
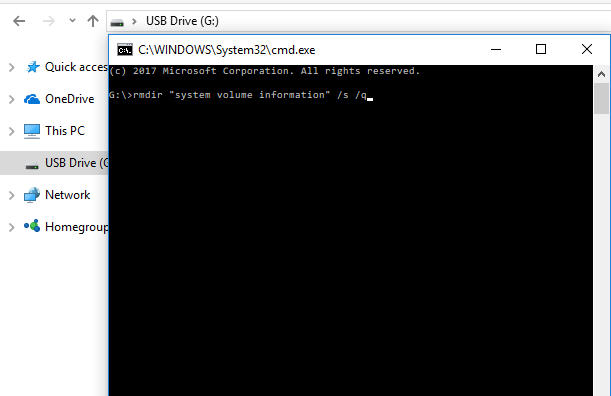
Connect the USB flash drive to your computer. Open File Explorer, double-click the USB drive letter, type cmd into the address bar, and press Enter.
This opens a command prompt scoped directly to that drive.

At the command prompt, type the following command to remove the folder:
rmdir “system volume information” /s /q
Press Enter. The folder is now removed.
Next, configure Windows so the folder does not return.
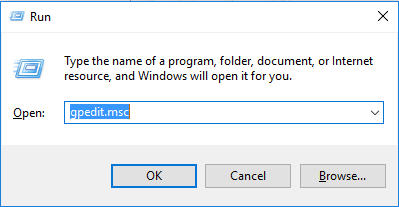
Press the Windows key and R together to open the Run dialog. Type gpedit.msc and click OK.
Navigate to Computer Configuration > Administrative Templates > Windows Components > Search.

Locate the policy labeled Do not allow locations on removable drives to be added to libraries and double-click it.

Select Enabled, then click Apply and OK.

To ensure indexing does not restart on reboot, press Windows + R again and type services.msc, then click OK.

Scroll down to Windows Search and double-click it. Set the Startup Type to Disabled, then click Apply and OK.
At this point, the System Volume Information folder has been removed and Windows has been configured not to recreate it, providing a permanent solution for USB flash drives.


